How to check your cellular Internet coverage
- Intro
- The methodology
- Review the official coverage maps
- Consider your speed requirements
- Consider costs
- Check signal strength
- Turn off WiFi, and check which cell network you’re on
- Run speed tests
- Next up: Select a data plan
Intro
If you’re interested in using a cellular Internet connection, then the first thing to do is decide which network to use. There are four major cellular networks in the US:
- Verizon
- AT&T
- T-Mobile
- Sprint
The list of mobile carriers will change as the 2020 merger between T-Mobile and Sprint gets implemented. As of April 2020, the two networks are still separate. This site will be kept up-to-date as the networks merge, and Dish emerges as a new option.
Numerous smaller providers resell services on the above networks. To avoid analysis paralysis, I recommend against thinking about those smaller providers this early on. Just focus on picking one of the four major carriers for now. You can dig into the different options within your chosen network later when you pick a data plan.
If you live outside the US, then you can still follow the methodology described on this page by adapting it to whatever carriers are in your country.
The methodology
I recommend deciding which network to use by going through the following steps until you’ve made a choice. Once you’ve decided, you can skip the rest of this page and move onto picking a data plan:
- Review the official coverage maps for all four networks
- Consider your speed requirements
- Consider costs
- Check signal strength
- Turn off WiFi, and check which cell network you’re on
- Run speed tests
Review the official coverage maps
Review the official coverage maps for all four carriers. Look for which ones indicate they’ll provide the strongest signal to your home:
- Verizon - a legend is available towards the bottom right, and the map has a tutorial
- AT&T - select the “Data” option before beginning your search, then use the legend at the bottom to interpret the colors
- T-Mobile - click the “LEGEND” button towards the top left of the page to see what each color represents
- Sprint - if you already have some idea of the device you’d like to use, then click the “Select Device” button to get a device-specific coverage map.
If you find yourself getting hung up on technical jargon, then take a look at the 4G, LTE, and 5G Demystified page.
Consider your speed requirements
If the official coverage maps show that one of the networks has better coverage at your location than the others, then you can move onto considering costs, because that network probably has the best performance at your location.
If multiple networks show that they offer similar signal strengths at your location, then it’s worth considering the relative performance differences between networks.
On average, some of the networks are just faster than others. Who’s fastest is a moving target, and PCMag’s Fastest Mobile Networks survey does an excellent job of capturing the state of the US market each year. Some of the key takeaways from their June 2019 report are:
- Who’s fastest varies by region and whether you are more concerned with upload or download speed.
- AT&T was the fastest overall in the US.
- T-Mobile was the fastest in the Southeast US.
- Verizon was the fastest in the South Central US
- Sprint lags behind the others in PCMag’s scoring, because of a design decision they made to prioritize download speed over upload speed. If your usage patterns are primarily downloading (for example, watching streaming content), then this could be a good thing. If you upload much content, then that’s a mark against Sprint.
If you’re unsure about your speed requirements, then AT&T’s monthly usage calculator is useful for estimation purposes.
Consider costs
As the Pick a Mobile Network and Data Plan page shows, T-Mobile and Sprint based carriers are usually the least expensive, Verizon’s usually the most expensive, and AT&T falls somewhere in between. Keep this in mind when evaluating your options. For example, if you find that two carriers show similarly good coverage, and one is cheaper than the other, then you might decide to move forward with the less expensive carrier’s network.
Check signal strength
Hopefully, the above sections narrowed down the list of candidates. If you’d like to perform any testing of the remaining candidates before you pick a data plan, then try to get a hold of a smartphone that works on the network you’re considering. I don’t recommend going to the expense of purchasing a whole new phone for this, but if you, a friend or family member already has a phone that works on the network you’re interested in, it will do the job.
The first thing we’ll evaluate using this smartphone is the network’s signal strength.
The bars on the phone are a weak indicator of signal strength because the precise meaning of different bar counts depends on the phone model and cell provider. What’s 3 bars for my Android phone on Sprint might be two bars for your iPhone on Verizon or vice versa.
Fortunately, there is a more objective and precise measurement of signal strength that you can use - RSSI.
RSSI is reported as a negative number, typically between -60 and -120 —the closer to -60 (the larger the number), the better the signal strength.
The procedure for finding the RSSI signal strength depends on what type of phone you’re using, so I’ll show how to find it on both Android and iOS:
Signal strength on Android
Android phones have a built-in signal strength indicator that’s more precise than looking at bars on your phone. This indicator isn’t ideal, because if you’re receiving signals on multiple bands (which is common), then it doesn’t differentiate between the signal received for each of them. Because of that, I recommend using an app that does differentiate between bands. An example is the free LTE Discovery app:
After installing and launching LTE Discovery, tap on the “Signal” tab, and examine the report:
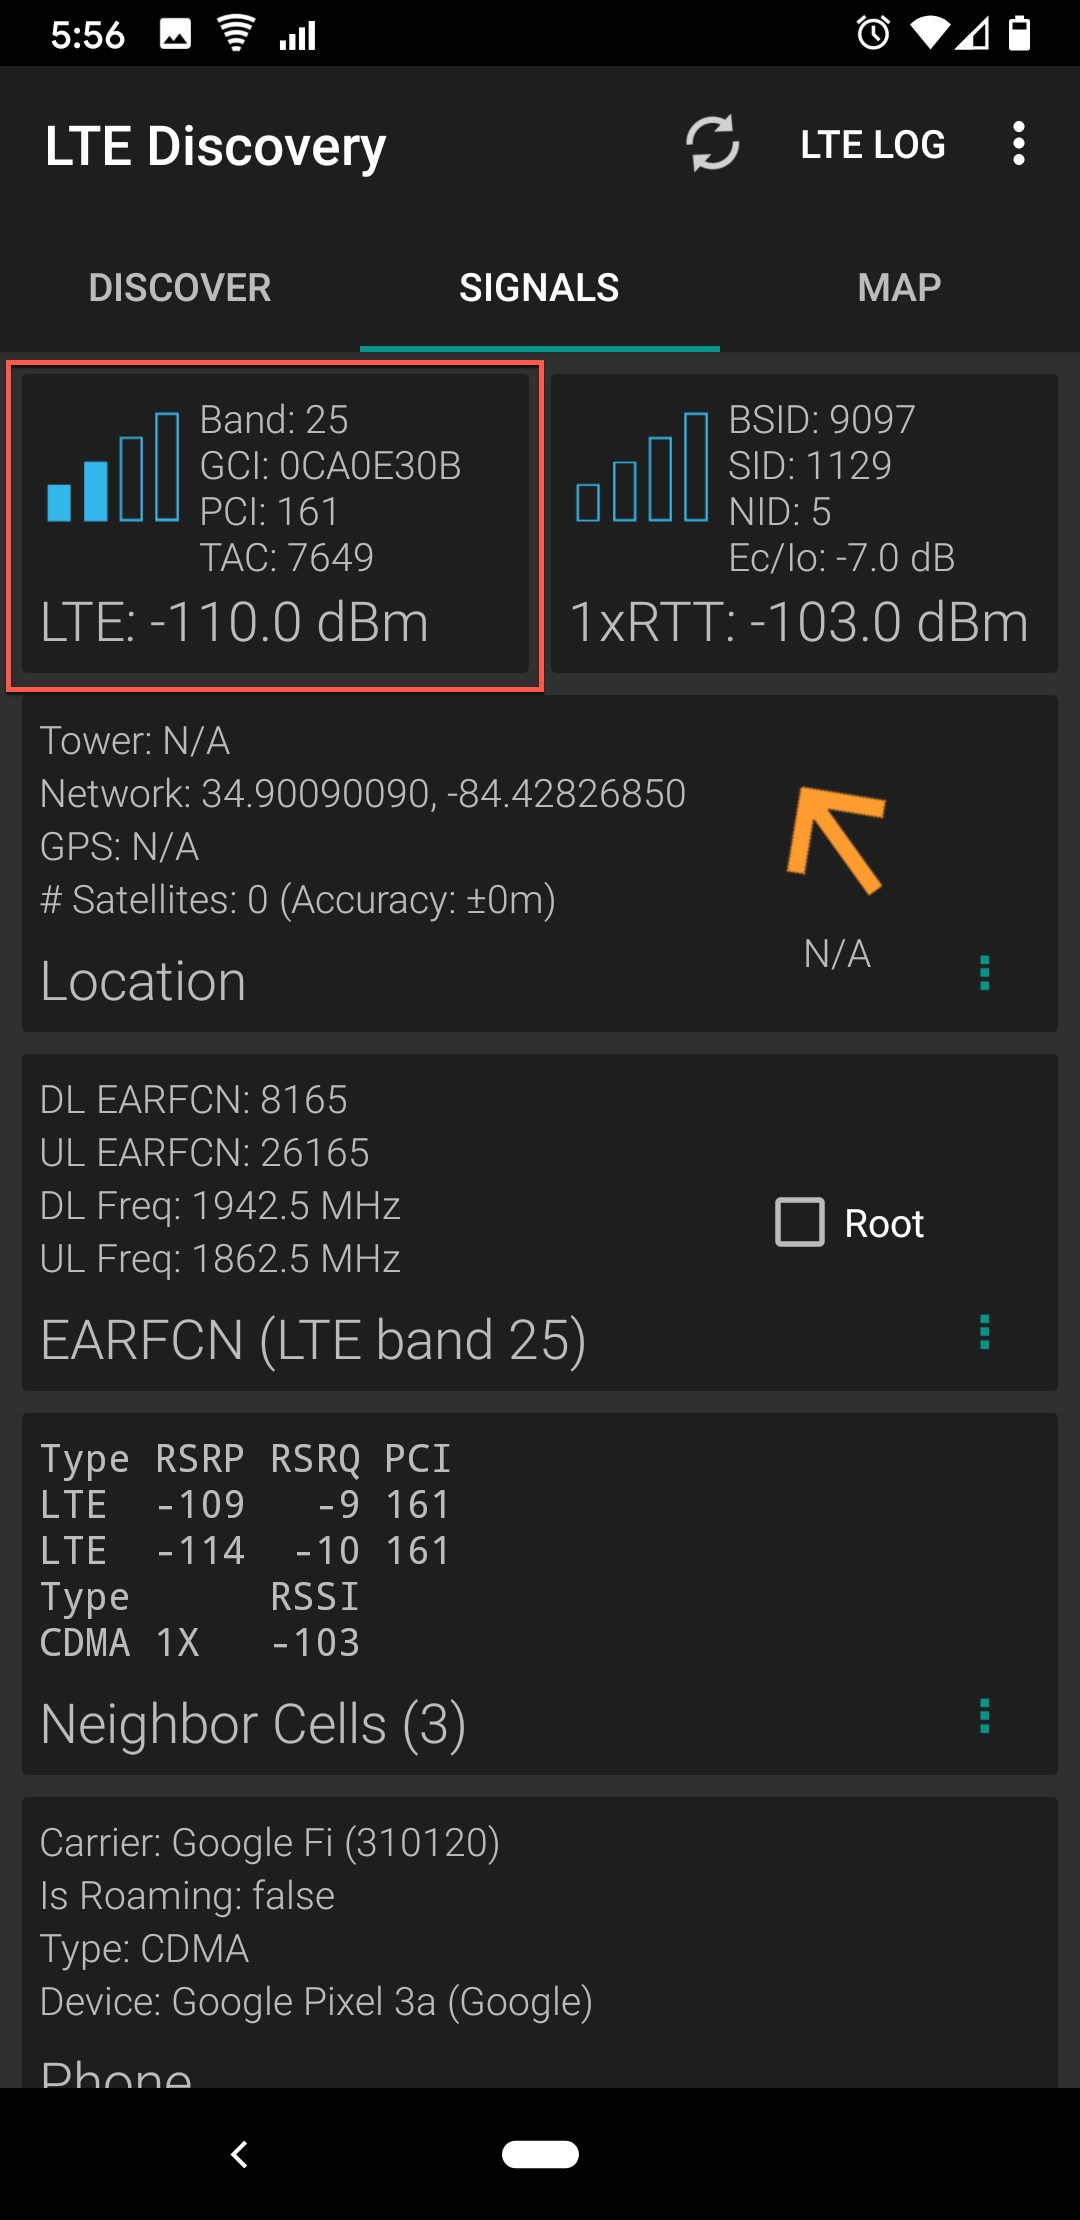
The above report should automatically update every few seconds. I drew a red box around the part of the report that we’re interested in. It shows that the LTE connection has a -110.0 dBm signal. There’s also a 1xRTT connection that has a strong signal, but, like 4G, LTE, and 5G Demystified shows, LTE usually is much faster than 1xRTT, so the LTE connection is the thing to watch as you walk around your home.
Signal strength on iOS
Apple is more restrictive about what apps are allowed to do in iOS than Google is with Android, so non-jailbroken iPhones don’t have apps like LTE Discovery available. Fortunately, Apple includes a feature called Field Test Mode with iOS that’s useful for gathering signal data. Here’s how to use it: n
-
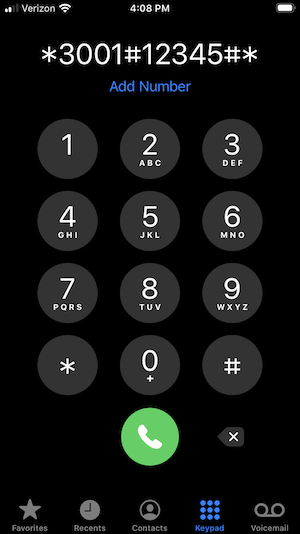
Dial *3001#12345#*:
-
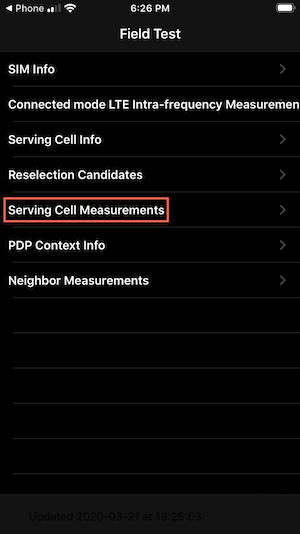
Tap “Serving Cell Measurements”:
-
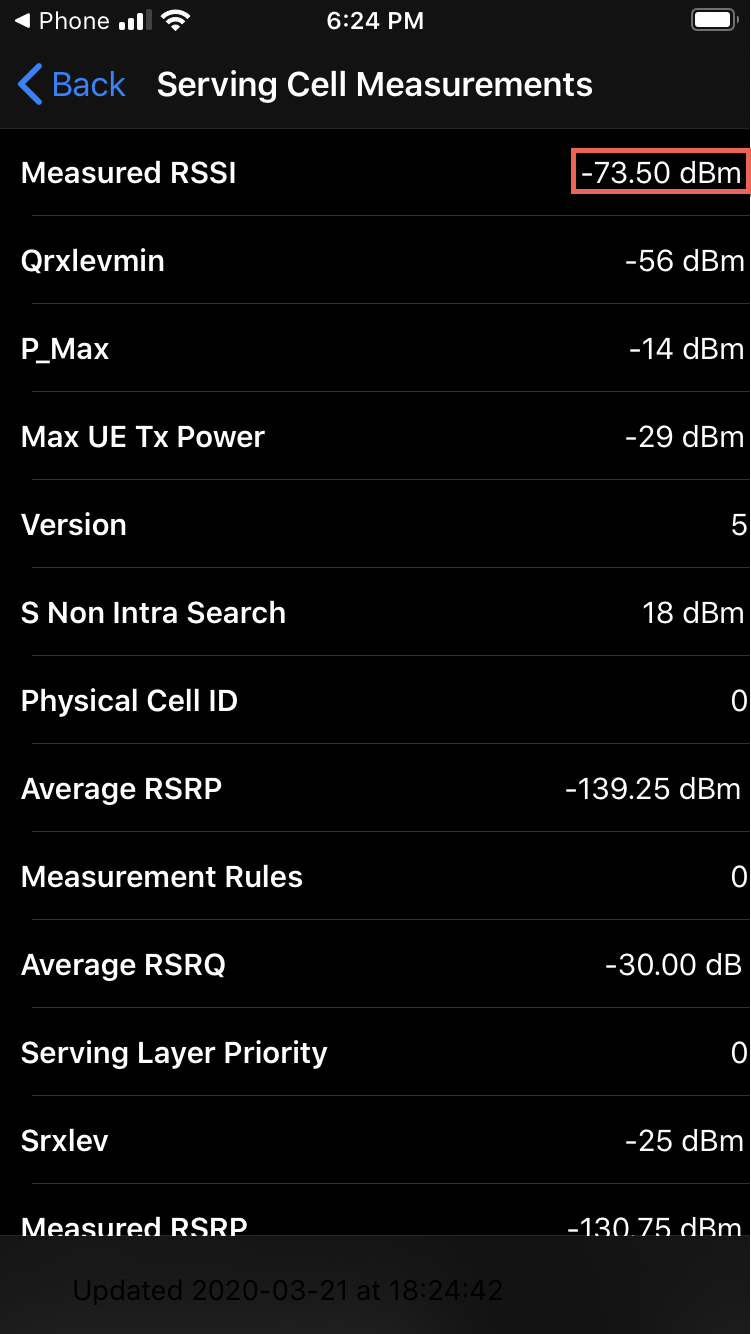
Keep an eye on the “RSSI” value as you walk around your home:
The above instructions are for iOS 13. If you’re on a version, then the sequence could be different. OSXDaily has a post on how to use Field Test Mode, which could be useful if the above instructions don’t match up with what you see in your iOS release.
Comparing signal strengths
The higher the signal strength, the better, so, for example, a -90 reading is better than a -100 reading.
I recommend walking around the inside and outside of your home to find the areas with the best signal.
Signal strength is useful as a relative indicator of connection quality but doesn’t tell you what speed to expect. In the next two sections, we’ll prepare for, then run some speed tests.
Turn off WiFi, and check which cell network you’re on
Next, turn off WiFi on your phone so that you don’t accidentally test out your home WiFi’s speed.
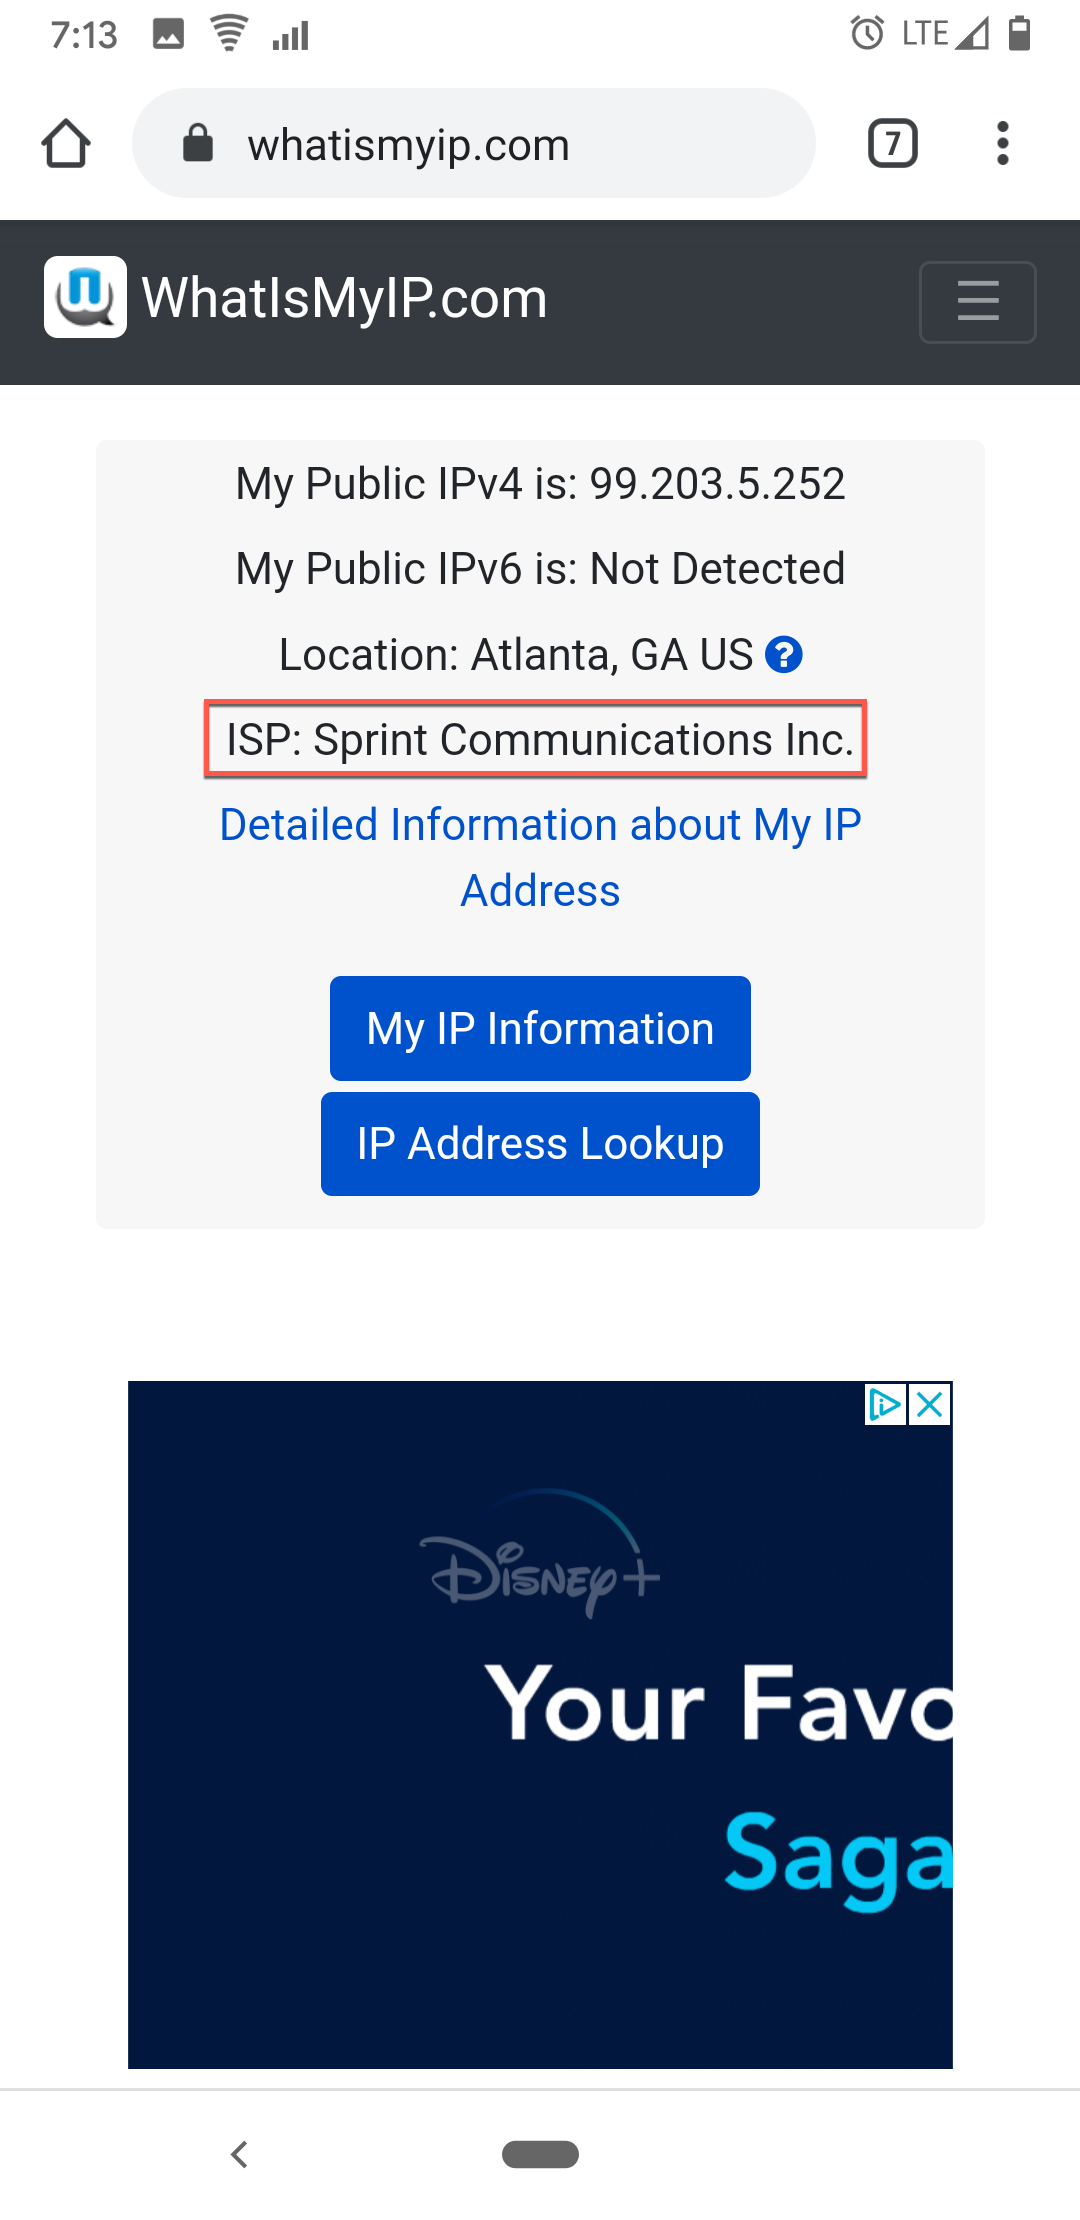
After you’ve turned off WiFi, go to https://www.whatismyip.com/ to verify that you’re accessing the Internet via the network that you think you are. The “ISP” field should show a name that matches up with the cellular network that you’re getting Internet access through:
Run speed tests
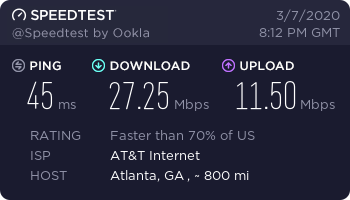
Now it’s time to run some speed tests.
This testing could drive up the bill for the phone that’s used. It will probably use a few megabytes per test, but that number varies, depends on the speed of the connection. The faster the connection, the more bandwidth each test uses.
Here’s the recommended testing procedure:
- Verify that WiFi is turned off.
- Revisit the locations that you identified earlier as having the strongest signal strength and run speed tests. Record your results as you go. Don’t be surprised if you find that you get the best speed from the location that doesn’t have the strongest signal strength. Other variables, like interference, also have an impact on speed.
- There can be much variability in performance, even when standing in the exact same spot, so after you have your top few candidates, you might want to revisit those same places, and re-test the speed.
Keep in mind that cellular routers can often get a better signal and speed than cell phones through mechanisms like better placement, and external antennas, so poor service or speed on a cell phone doesn’t necessarily mean poor prospects for Internet connectivity.
Next up: Select a data plan
After you’ve identified the network (or networks) that look viable for your location, it’s time to pick a mobile network and data plan that operates on that network.
« Previous: Outdoor Installation Next: Pick a Data Plan »