How I switched my home Internet connection from ADSL to a faster 4G LTE connection
- Rural Internet access can be slow
Starlink4G LTE to the rescue- Research
- A working prototype
- Experimenting with antennas
- The WiFi bottleneck
- Cutting the cord on DSL
- Economics of the switch
- Closing
Rural Internet access can be slow
In 2009, my wife and I moved from a small city where we had a fast (for the time) and reliable cable modem Internet connection to a rural area surrounded by National Forest. The only Internet connection options at our new home were ADSL, satellite, and dial-up.
Satellite and dial-up weren’t viable for either of us (we work from home), so we ordered the fastest available ADSL connection, which ran at about 10Mbps down and 1Mbps up. That was “good enough” 11 years ago, but was problematic by 2020 when the fastest available connection speed was unchanged. It was a problem for video conferencing, in particular where the 1Mbps upload speed couldn’t keep up.
I ordered a second ADSL connection a few years ago and configured a router to load balance traffic on a round-robin basis between the two connections. That helped, but the 1Mbps upload limit still applied to each request, so I still couldn’t, for example, upload a single file at more than 1Mbps. A downside of the second ADSL connection that it doubled the Internet connection bill.
Starlink 4G LTE to the rescue
In January 2020, one of my coworkers, and I discussed SpaceX’s plans to provide low latency satellite Internet via Starlink. The service looks interesting. If it were available today, reasonably priced, and as-advertised, then I’d sign up without hesitation. The service isn’t available yet, however.
Jonathan recently moved from Chicago to a rural part of Ohio and found that the best available Internet connectivity option for him was a cellular connection. He plugged an LTE router into an antenna mounted on his roof and pointed at the nearest cell phone tower. With that, he was able to get an Internet connection that ran at about 50Mbps down and 10Mbps up, compared to the next best option, which was an ADSL line advertised at 5Mbps down and 768Kbps up.
In other words, instead of accepting an ADSL Internet connection that would have been even slower than mine, Jonathan set up an LTE connection that was 5x as fast for downloads and 10x as fast for uploads as my Internet connection.
Research
The conversation with Jonathan inspired me to do some research on whether a similar approach would work in my area. I reviewed the coverage maps of the cell phone carriers in my area, topological profiles between my house, and the nearest cell towers, what bands each provider used, and what equipment was on the market.
This is a topological map showing what’s a local cell tower, and my house. Some of the non-topological data shown doesn’t match the equipment used. The Check Coverage page has details.
I selected an initial cellular provider, set of test equipment, and data plan—time for a prototype
A working prototype
I constructed a prototype, which was meant to be the minimal potentially viable configuration. If it worked, I’d invest in a permanent solution, and if it failed, I’d be able to return most of the equipment, and recover most of the money spent.
Here’s what I purchased for the prototype:
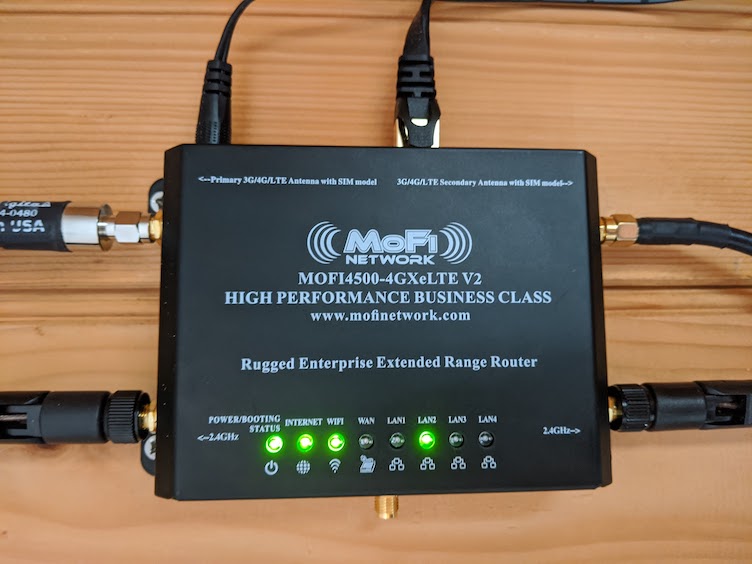
- A MOFI4500 router
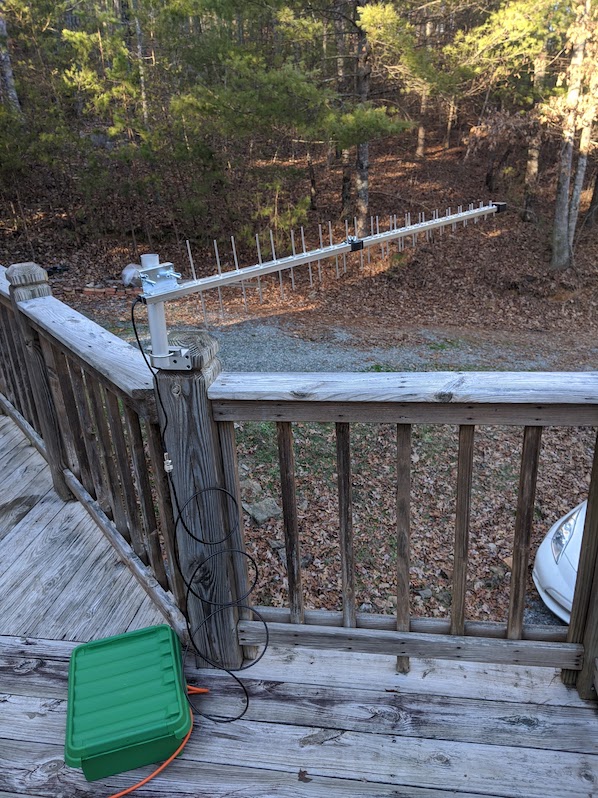
- A wideband directional antenna from Wilson. This is a yagi antenna that’s rated to have 7.3 dBi gain at 700MHz - the band that my research suggested I’d be most likely to get a signal with
- A 39” (100cm) coax cable to connect the antenna and router
Some other equipment that I already had on hand was also used:
- An old antenna mount that was previously used by a cell phone repeater’s antenna was used as a temporary mounting point
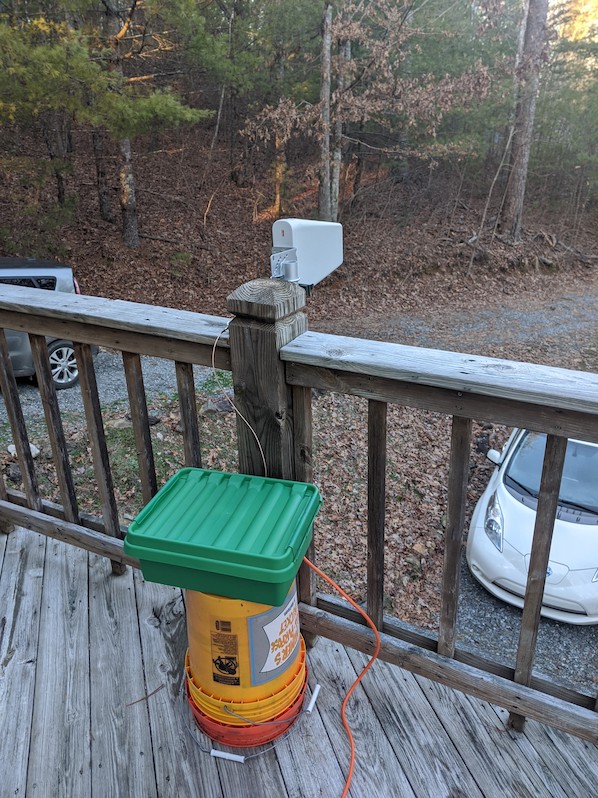
- A waterproof enclosure was used to keep the equipment dry for the multiple days that the prototype was in operation
- The coax cable was too short, so a couple of buckets were used to elevate the outdoor enclosure enough for the cable to reach the antenna
- An extension cord
A working prototype for high-speed rural Internet access
The prototype worked better than I expected. The connection had about 1.2x the download speed of my DSL connection, which was nice, but the more significant upgrade was that the upload speed was 12x as fast as what DSL provided.
The prototype was a success, but the shortcuts that were taken to reduce costs and save time left some questions and issues:
- The antenna configuration was reflective of the goal of creating a minimal viable configuration. It used a moderate gain antenna that was mounted in the most convenient location. Perhaps a better-placed antenna, higher gain antenna, amplifier, or second antenna to enable MIMO would help.
- The router was outdoors, and it wasn’t clear to me from looking at its manual, whether it was designed to handle temperature extremes.
- There was no backup power. The router was plugged straight into an electrical outlet, and there wasn’t enough space in the waterproof enclosure to add a useful battery backup.
- The system worked well 99% of the time, but for a then-unknown reason (described in The WiFi bottleneck), the connection would become unusable the other 1% of the time.
- There was no lightning protection.
Experimenting with antennas
The prototype was a success, so it was time to iterate on it. I purchased two more antennas:
- A yagi antenna that was rated to have 15dBi of gain. This was 4.5dbI more gain than the prototype’s first antenna provided.
- A yagi antenna that was rated to have 11dbI of gain. This looked like about the same amount of gain as the antenna that the prototype already used (10.5dBi) but was made by a different manufacturer, so I was curious about whether one would outperform the other by more than the 0.5dBi of rated gain difference implied.
Unless you have a radio background, you’re probably wondering what the dBi measurement that I just used means. It’s a measure of signal strength, where the higher the number, the stronger the signal is. It uses a logarithmic scale, so every 3dBi increase represents a doubling of power, and every 10dBi increase represents a 10x multiplication in power. The Select Hardware page has more details on antenna selection metrics.
First up in my testing was the 15dBi yagi. On paper, it would provide a 4.5dBi improvement over the original antenna:
The 15dBi antenna did get a stronger signal than the original yagi but not consistently. Its signal strength varied more from moment to moment than the original antenna did. The Internet connection performance was also more variable, but with about the same mean upload and download speeds as the original antenna.
I do not have direct line-of-sight to the tower that I’m connecting to. My theory for the 15dBi antenna’s poor performance is that the signals that are received come in via multiple paths and that a lower gain antenna can handle the multiple paths more consistently.
Since the 15dBi antenna was bulkier, more expensive, and less reliable, I decided not to use it after this initial round of testing.
Next was 11dDbi gain yagi antenna that on paper, had similar performance characteristics to the 10.5dBi yagi used by the original prototype. I purchased it to answer two questions:
1. Which antenna performs better by itself?
The answer is, it’s a tie. The 10.5dDi and 11dBi antennas show the same range in signal strength, latency, upload, and download speed when used individually.
When the two antennas are combined, they alternate on which receives the stronger signal, with no clear winner. For example, the screenshot below shows a report from the MOFI4500’s signal strength page. The last and third-to-last fields show the strength of the signal received by each of the antennas.
2. Does a two-antenna configuration outperform a single antenna configuration?
The short answer is yes, it does. The specifics vary by location and cellular provider, but in my case, I saw about a 30% boost in both download and uploads speeds by using two antennas instead of one. The speed boost is thanks to MIMO (multiple-input multiple-output), which is discussed on the Select Hardware page.
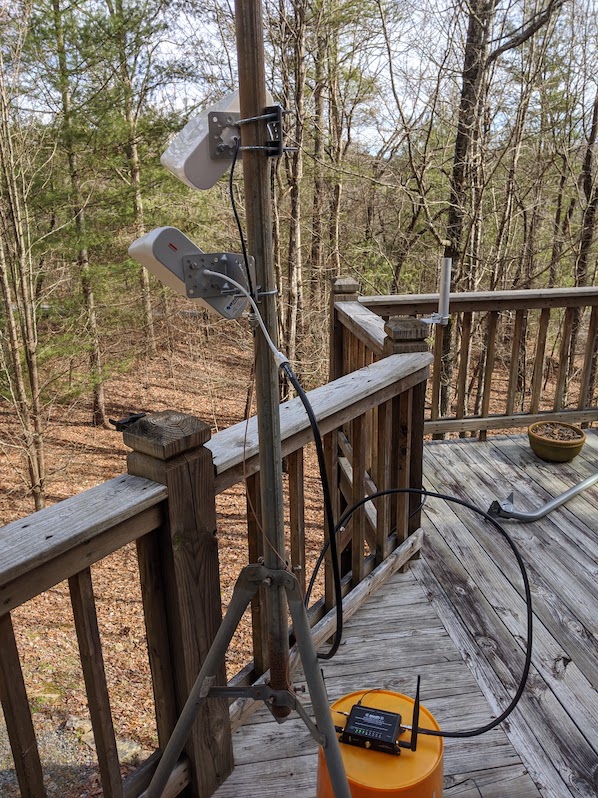
Here’s a photo of the prototype updated to use two antennas:
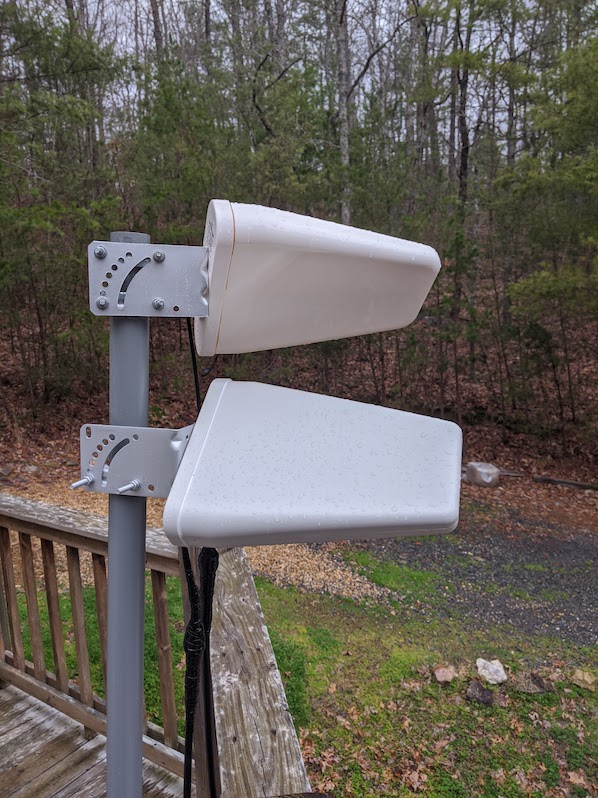
The two antennas are intentionally mounted at 90-degree angles to each other to improve performance by putting them out of phase with each other.
The WiFi bottleneck
The dual-antenna configuration sped up the Internet connection, but I still had the nagging problem of the Internet connection becoming unusable 1% or so of the time.
Previously, I assumed that the problem was that the cellular signal was dropping out. While testing out the different antenna configurations, I noticed that none of them made a noticeable difference in terms of reliability, despite the performance differences.
Troubleshooting the reliability problem revealed that the problem was the router’s WiFi connection. Packet loss to it hovered at around 1%, even though it was only about 15’ from my laptop. Once I plugged into one of the router’s Ethernet ports, the packet loss issue disappeared, and the Internet connection became reliable.
Cutting the cord on DSL
With the reliability problem resolved, I was ready to cancel service on my DSL lines and perform a permanent install of the LTE system. To do so, I’d need to overcome the following issues which were still present in the latest prototype:
- The router was outdoors, and it wasn’t clear to me from looking at its manual, whether it was designed to handle temperature extremes.
- There was no backup power. The router was plugged straight into an electrical outlet, and there wasn’t enough space in the waterproof enclosure to add a useful battery backup.
- There was no lightning protection.
I overcame these issues by doing the following:
- Installed an antenna mount to replace the tripod used in earlier testing
- Moved the router indoors and plugged it into a UPS
- Ran coax cabling from the outdoor antennas to (grounded) lightning protectors, then to the router
The final antenna configuration.
The final router configuration.
With this configuration in place, the download speed averages around 20Mbps, and the upload speed averages around 12Mbps. Both figures are likely to seem slow to those living in more urban areas, but they’re a nice upgrade compared to the DSL lines that were used previously.
I’m now 100% switched over from the old DSL connections to the new LTE connection.
It felt great to cancel the service on the two old DSL lines.
Economics of the switch
Before switching over to this configuration, I was paying $163.96/month for two ADSL connections. Sadly, that’s not a typo. Each line cost $81.90/month and provided the fastest fixed-line Internet service available to my home.
After the switch, I’m paying UbiFi $90/month for their unlimited data plan, which runs over AT&T’s network.
Here’s the equipment that I purchased:
| Item | Cost |
|---|---|
| MOFI4500 router | $314.99 |
| Wilson wideband directional antenna | $49.20 |
| Proxicast wideband directional antenna | $64.15 |
| 2 x 20’ LMR-400 N male cables | $109.90 |
| 7’ LMR-400 N male to SMA male cable | $28.78 |
| 10’ LMR-240 N male to SMA male cable | $26.98 |
| 2 x lightning arresters | $29.92 |
| 10 AWG grounding wire | $11.00 |
| 3M Super 33+ tape | $5.69 |
| 3M Temflex Rubber Splicing Tape 2155 | $6.88 |
| 39” (1 meter) J-pipe antenna mount | $23.33 |
| Cable clamps | $10.98 |
| Total | $681.80 |
The new Internet connection costs a total of $681.80 to set up and saves $73.96 a month, so the break-even point is 9.2 months, after which I’ll save money.
$681.80 upfront and $90 per month are both a lot of money. Those expenses are worth it to me since I telecommute, but not everyone is willing to spend that much for a faster Internet connection.
By contrast:
- My backup connection only uses $44.99 worth of equipment and has lower monthly charges.
- The indoor-only configuration that I’m currently experimenting with is expected to be an option that’s less expensive than the configuration described on this page, but faster than my backup connection.
If you’re interested in learning more about your hardware options, then check out this site’s hardware selection page.
Closing
I hope you found this example configuration useful. If you’re interested in setting up your own home LTE Internet connection, then my recommended next stop is this site’s Check Coverage page.
« Previous: Indoor Installation Next: Check Coverage »

